Today I am going to walk you step by step on how to build a simple static website using Amazon S3. Sometimes all you need is a little HTML and CSS for a successful website. In fact, it can often be faster to develop a website without an entire web framework.
What is a static site?
A static site is a website that is a collection of HTML and other assets that does not get served from a web framework. A static site is in no way non-interactive though.
The static part just refers to the way the HTML and other assets are served to browsers when a user navigates to your website. There is no web framework serving those assets to the browser dynamically, the site loads up and then uses JavaScript to interact with other web servers and API's.
Examples of cool web applications that are static
Mint: Budget Tracker & Planner
Dropbox
What is the value of using a static site?
HTML and CSS are all you need to get started with a simple static site.
Static sites do not need to be served by a web server. You don't need the infrastructure that is otherwise required to host a web framework. Developing a website without an entire web framework can be more efficient.
You also benefit from a separation of concerns, your front end is just that, no templating languages or calling methods on your models in your view. You get to just deal with the frontend without worrying about the backend.
The steps for building your first static site:
- Build a tiny bit of HTML
- Upload the HTML to an AWS S3 Bucket
- Make the Bucket accessible and public
- Add some JS and CSS to make your "static" site shine!
Getting started with your HTML file
The easiest way to do it, is to create an HTML file. Traditionally this is called index.html but the naming doesn’t matter too much. You can point the web server to serve whatever HTML file you want.
<!DOCTYPE >
<html>
<body>
Hello World!
</body>
</html>
Now you have some basic HTML and you need to serve that somewhere. One of the easiest options is to simply upload the HTML file to an S3 bucket on AWS.
Create a new bucket on AWS
First, head to the S3 console on AWS. You need to add a new bucket.
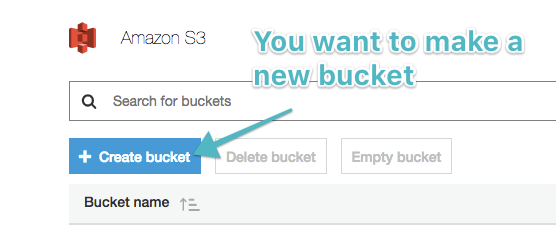
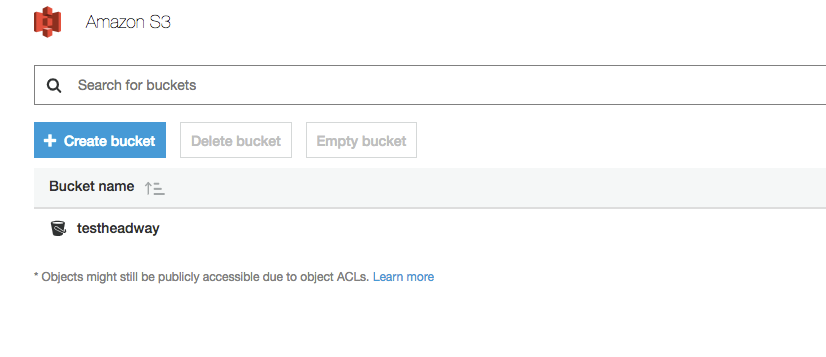
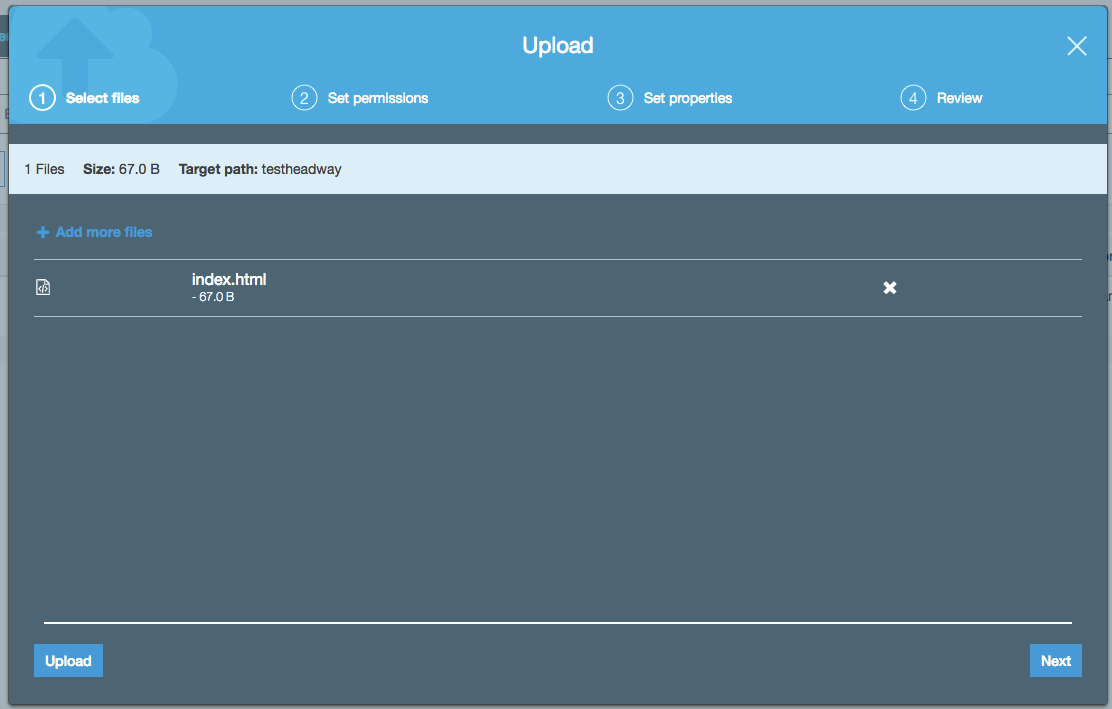
For this example, I just created a public bucket named "testheadway." Don’t worry about the settings yet. Just click through to get the bucket created.
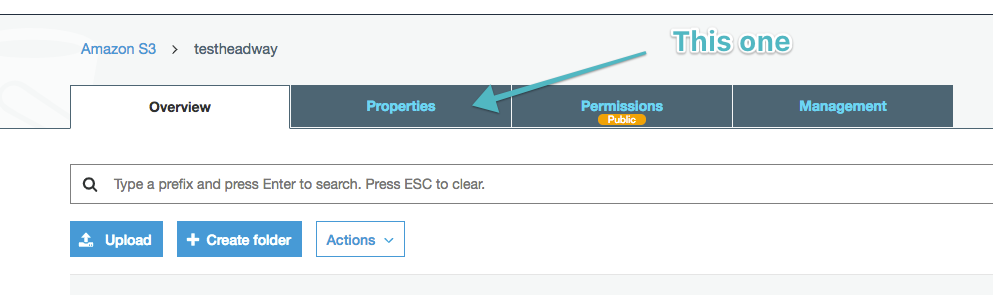
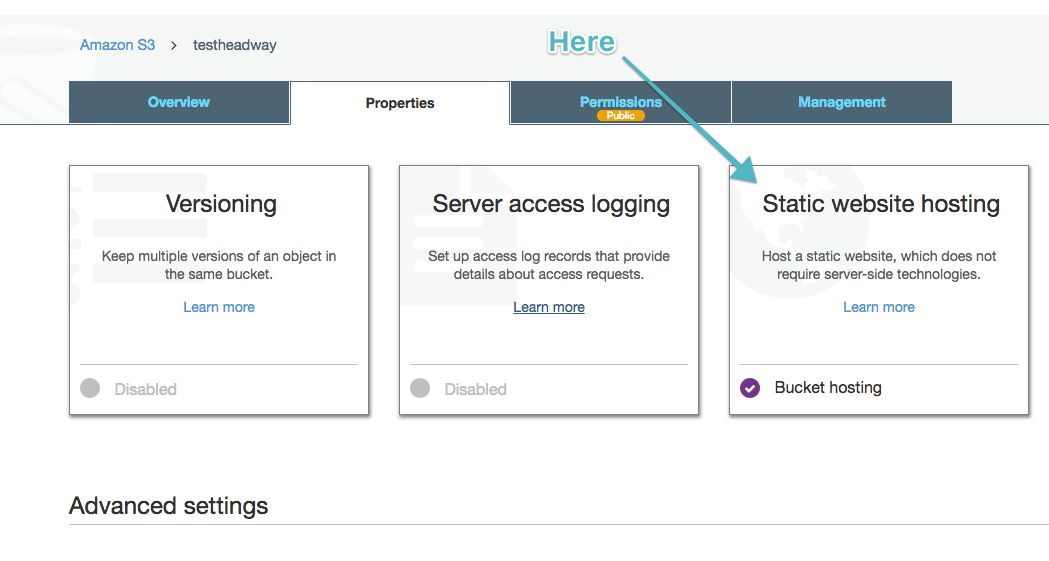
Edit the bucket for hosting abilities
Next you need to turn on the ability for the bucket to host a static website. Click on the bucket to edit it.
Once we’re in the edit view for the bucket, head to the "Properties" tab for the bucket.
Then click into the Static website hosting card.
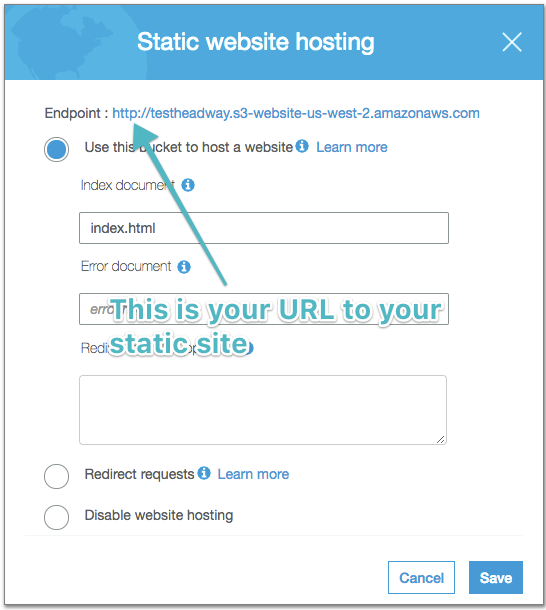
Now select "Use this bucket to host a website" and add the name of your index document this is almost always going to be your index.html it should match the name of the document you created earlier.

Easy peasy if you ask me!
Now, once this is turned on you should see an endpoint for your S3 bucket. This is the URL used to access your newly created static website.
## Edit the bucket permissions
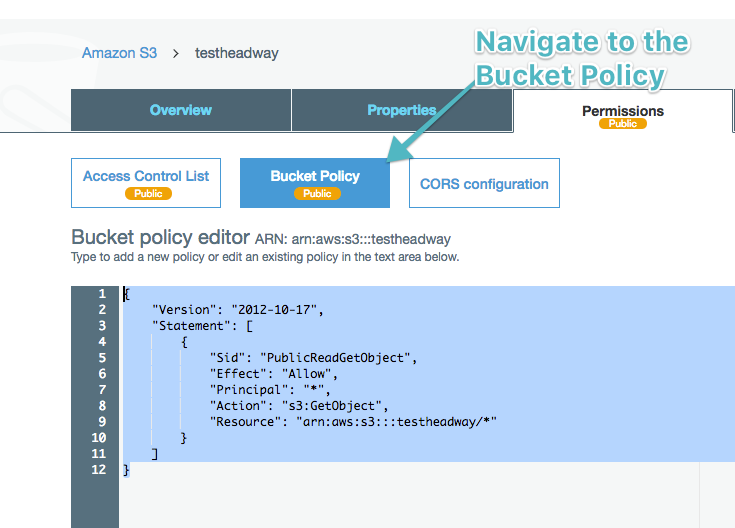
You need to adjust a few more settings to have public access to this S3 bucket. The bucket permissions need to allow everyone to getObject's from your bucket. As basic policy could look like the below. Just make sure to update the "Resource" to be the name of your S3 bucket.
Note: This is not secure nor recommended for production ready static sites. Seek an AWS security expert for recommended bucket permissions.
{
	"Version": "2012-10-17",
	"Statement": [
		{
			"Sid": "PublicReadGetObject",
			"Effect": "Allow",
			"Principal": "*",
			"Action": "s3:GetObject",
			"Resource": "arn:aws:s3:::yourbucketname/*"
		}
	]
}
Copy and paste the below in the Bucket Policy by heading to Permissions.
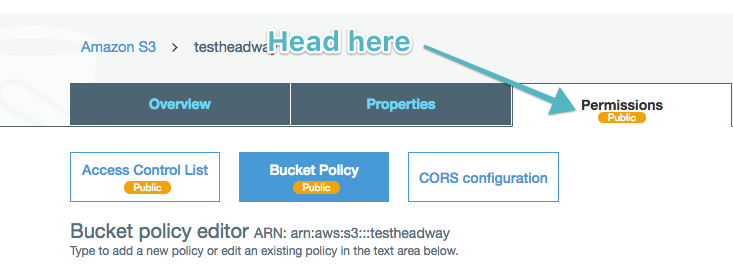
The next step is to click into the Bucket Policy.
Now, you need to save the getObject policy. AWS will warn you that you are giving public access to your objects in your bucket. This policy only allows people to access objects in your bucket, which is what you want since people are going to be accessing your index.html.
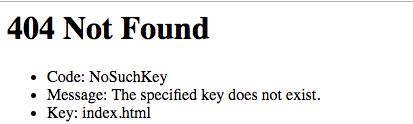
If you head to that URL now you can see that you get a giant 404.
This is expected, you haven’t uploaded your index.html file yet.
Upload the index.html
The next step is to upload your index.html.
At this point, if you head back to the bucket URL you should see your HTML rendered in the browser.
Congratulations, you’ve got a basic website being hosted from AWS!
Here are some ways you can extend the site easily with some CSS and JS.
In the same way that it was pretty easy to serve straight up HTML, it’s just as easy to add some CSS to your application.
Stick a new file into your directory called styles.css. Like other static site generators you can add some basic styling to your HTML just by referencing the CSS in your HTML.
Your HTML should now look like:
<!DOCTYPE >
<html>
<head>
<link href="https://fonts.googleapis.com/css?family=Roboto" rel="stylesheet">
<link rel="stylesheet" href="styles.css">
</head>
<body>
<div class='center'>
<h1>
Hello World!
</h1>
</div>
</body>
</html>
Now you can add some styling to the styles.css style sheet like:
h1 {
	font-family: 'Roboto', sans-serif;
}
.center {
	width: 100%;
	display: flex;
	flex-direction: row;
	align-items: center;
	justify-content: center;
}
Now you just need to delete the index.html file from the S3 bucket and upload these two files and you should have a minimally styled website up and running.
It should look something like:

Using jQuery to add new elements
So far you have done all of this with no Javascript and no web server or application server. How can you interact with the world outside of your little app? Well, you need to add some JavaScript to make that happen. But, that is pretty easy too. Just update the HTML to pull in some JavaScript, you are going to use jQuery to quickly grab some weather and display it on your static site.
You only have three files. Pretty easy and simple, but very powerful.
<!DOCTYPE >
<html>
<head>
<link href="[https://fonts.googleapis.com/css?family=Roboto](https://fonts.googleapis.com/css?family=Roboto)" rel="stylesheet">
<link rel="stylesheet" href="styles.css">
<script src="[http://code.jquery.com/jquery-latest.min.js](http://code.jquery.com/jquery-latest.min.js)" type="text/javascript"></script>
<script src="weather.js" type="text/javascript"></script>
</head>
<body>
<div class='center'>
<h1>
Hello World!
</h1>
<button id='weather_button' class='basic_button'>
Get my Weather
</button>
<div class='error'>
</div>
<div class='weather'>
<div class='city-name text'>
</div>
<div class='weather-main text'>
</div>
<div class='description text'>
</div>
</div>
</div>
</body>
</html>
Your slightly more complete CSS:
h1 {
	font-family: 'Roboto', sans-serif;
}

.center {
	width: 100%;
	display: flex;
	flex-direction: column;
	align-items: center;
	justify-content: center;
}

.text {
	margin-top: 30px;
	font-family: 'Roboto', sans-serif;
}

.basic_button {
	font-family: 'Roboto', sans-serif;
	font-size: 18;
	margin-top: 30px;
	width: 300px;
	height: 45px;
	border-radius: 4px;
	background-color: #44AAB5
}
Some JS to interact with a weather API and make your static site a little more interesting.
$(document).ready(function() {
	$("#weather_button").click(function(e) {
		console.log(e)
		e.preventDefault();
		$.ajax({
			type: "POST",
			data: 'json',
			url: 'https://api.openweathermap.org/data/2.5/weather?zip=98229,us&appid=useyourownopenweathermapkeyplease',
			success: function(result) {
				console.log(result)
				$( ".city-name" ).text(result.name);
				$(".weather-main").text(
					result.weather &&
					result.weather[0] &&
					result.weather[0].main
				)
				$(".description").text(
					result.weather &&
					result.weather[0] &&
					result.weather[0].description
				)
			},
			error: function(result) {
				console.log('error', result)
				$(".error").text(result.error)
			}
		});
	});
});
Checkout the final product here, it’s not so static after all 😉:
See the "testheadway" website
This same process stands with a single page application (SPA) with React. If you want to host your SPA on S3 all you would need to do is build your React app and then add all the static assets (HTML, JS, CSS files) to your S3 bucket.
If you built your SPA from a `create-react-app` application there is already a build command to build your app.
You need to run:
`npm run build`
This should build your static assets and compile them into the build directory for your application.
Instead of uploading a single HTML file, you'll upload the contents of the build directory to the S3 bucket.
`my-react-directory/build`
Now your React app will mount when it finds your index.html.
The advantages of building a static site vs a dynamic site
There are many ways to build web applications in todays day in age, and one of them is to host a static site and let it interact with your backend.
While there are certainly challenges to building websites in this manner there are plenty of positives as well, including separating concerns between the front end and the backend, more easily supporting multiple clients, and better supporting modern JavaScript SPA’s.
Overall this is a quick overview of how you can build a sample application completely from a static website that is easily and cheaply host on Amazon S3.
Let me know if you have any questions about static sites or if we can help you build a SPA, a static site, or help you deploy your static site to Amazon S3, we’re happy to help.
Recommended resources for building static sites
Deploying a create React app:
Facebook Github - Create React App: Deployment