Let’s talk about the essential tools for creating consistent bug-free code.
What you’ll learn to do
This will be a step-by-step breakdown for setting up a new React Native app with the help of Expo, Typescript, Prettier, and ESLint.
At the end of this article, you should have a fully functional React Native app running inside the Expo Go application, allowing you to use your new app as a playground for continued learning.
Why it matters
A properly set up environment is essential for every project. Utilizing these packages will significantly improve development speed and project quality by:
- Auto-formatting your documents
- Utilizing linting to catch bugs before they occur
- Strongly typing your javascript to provide clear definitions for your components
Prerequisites
Follow the Expo installation guide found here. Once you have completed the setup and get to the section "Use Expo CLI" you can stop and return to this walkthrough
While building your application with Expo and EAS will require you to reference more of the Expo documentation, simply following the setup guide linked above is sufficient to follow and complete this guide.
Once you have completed the setup, you can return the Expo documentation and continue learning there.
Frameworks and tools we’ll cover
Expo
Expo is an open-source framework that helps manage, build, and submit your React Native projects. It abstracts the hard parts of the building and management process that typically come with React Native apps and allows you, the developer, to focus on what is most important, creating your app. Expo can also be leveraged to easily send push notifications and deploy OTA updates of your javascript bundle to apply necessary hotfixes to your users.
ESLint
ESLint is a powerful utility that analyzes your code and provides helpful feedback on improving your code and limiting bugs. ESLint finds things like unused references, improper variable initializations, and improper code formatting that can lead to, or are actively causing, errors in your project.
Typescript
Typescript transforms your weakly typed javascript into strongly typed javascript. It’s that simple. Typescript is a must-have for any React Native project, and I never start a project without it. Paired with VSCode, it is a powerful tool that provides helpful information during development to help you code quickly and reliably.
Prettier
Prettier is a code formatter. It serves no purpose outside of formatting your code consistently and reliably. Long gone are the days of code review, which involve tabs vs. spaces, line length, and how to format braces properly. Prettier paired with VSCode (and formatting on save) will immediately format your file. You can ensure formatting is consistent for all developers when paired with VSCode workspace settings (described in this article).
Setup the environment
Step one will be setting up your environment. This will require installing multiple CLI’s (command line interfaces), VSCode, and multiple extensions. This article is not meant to be an exhaustive walkthrough of that initial setup. However, Expo offers a great resource and guide for installing these dependencies, which can be found [here](https://docs.expo.dev/get-started/installation/). Again, once you have the initial setup complete, you can come back and continue the setup.
Creating your first app
Now that you have completed the initial setup, we can start creating a new app! Since we are creating a custom setup, we will ignore any templates and just set up a vanilla React Native Project using Expo.
Open a new Terminal and navigate to the folder you want to create the app within. I like to keep my projects nested within a development folder organized by language.
For me, that would be:
/Development/react-native/{project_name}
Run the following command (you can replace blog test with any name you want):
`npx create-expo-app blog-test`
This command may take a while, so be patient. It will download the necessary files and create your project!
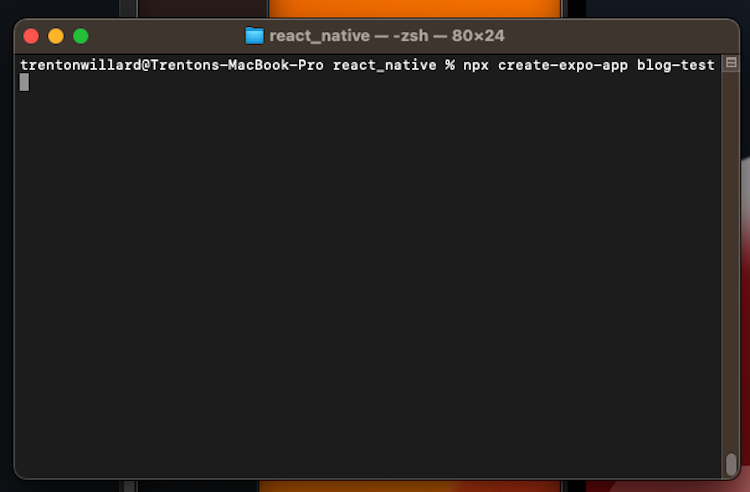
Once that has finished, your project is created! The next step is to open your project in VSCode. It should look similar to the image below.
You should see your project files on the left.
Notice the App.js file is javascript, not typescript! Don’t worry. We will resolve this soon.
For now, let’s verify that your project is working as expected. Open a new terminal window in VSCode.
The command for this is:
ctrl + Shift + `
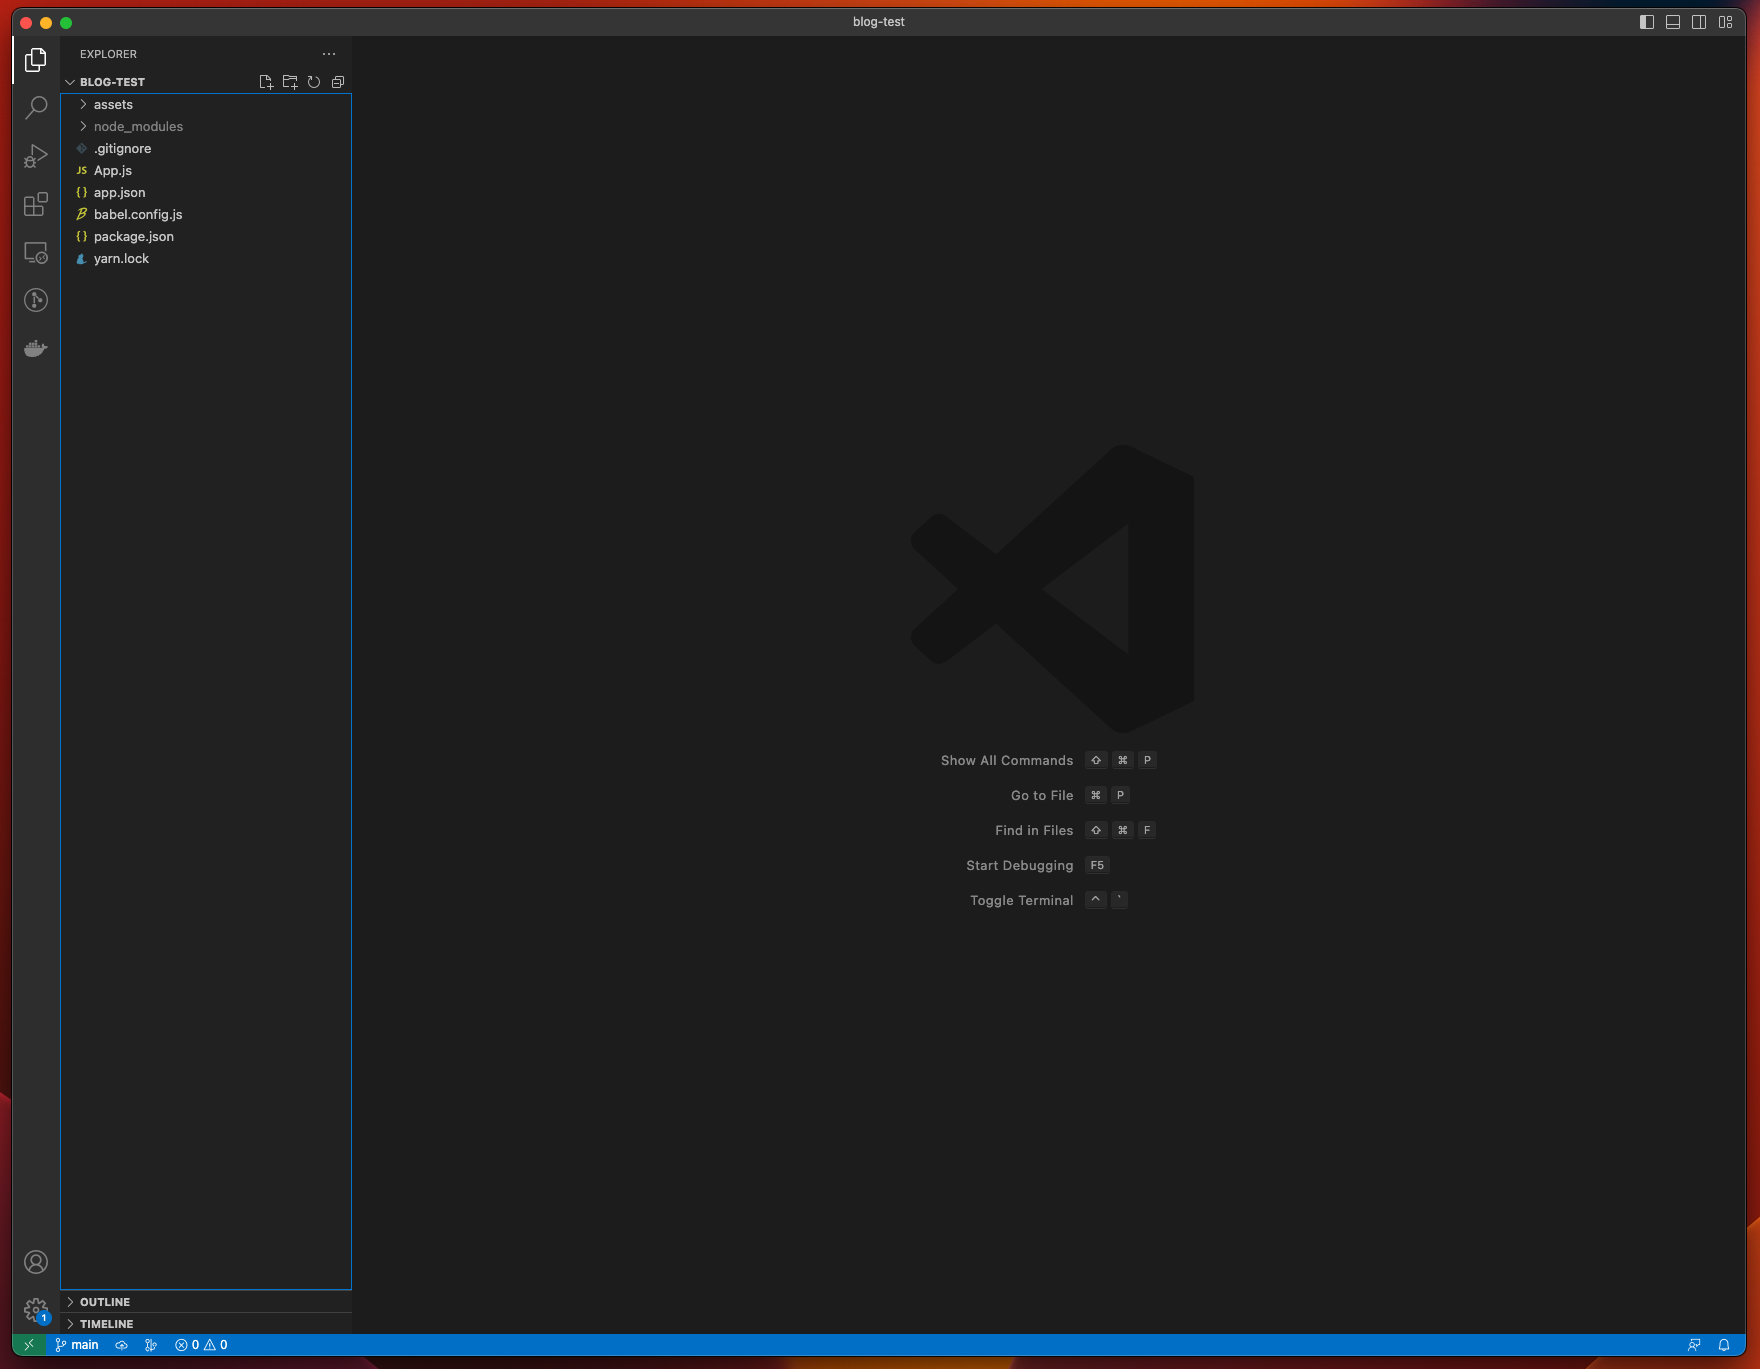
In your new terminal, run the following command:
`yarn start`
You should see something similar to the image above…
_But what exactly happened?_
Your project server is now running, which is good, but it’s not serving your javascript bundle to a device.
That’s where the power of Expo Go comes in!
When we open the application on the emulator, it will automatically install expo go for us and run the app inside that environment. Part of what makes Expo so powerful is that we have made it to this step without setting up _any_ native code.
Learn at your own pace
Expo allows you to learn at your own pace by letting you start up a project without bombarding you with many native setups. When the time comes, you can create a development version of your application easily. Before that, we must ensure your environment is set up correctly.
Running the app in the emulator
To run the application inside the emulator, click inside the terminal where it says, “Logs for your project will appear below.”
_Notice the commands above that line?_
Press “i” to open the application inside the emulator. If you have one running already, it will open it. However, the terminal may ask you to choose a device.
I personally prefer to run my start-up application on the newest, biggest mobile device possible (it’s just cool). As of this writing, it is the iPhone 14 Pro Max. However, feel free to select any device you want.
Expo Go will be installed on the device, and your javascript bundle will be served.
You should be greeted with the following
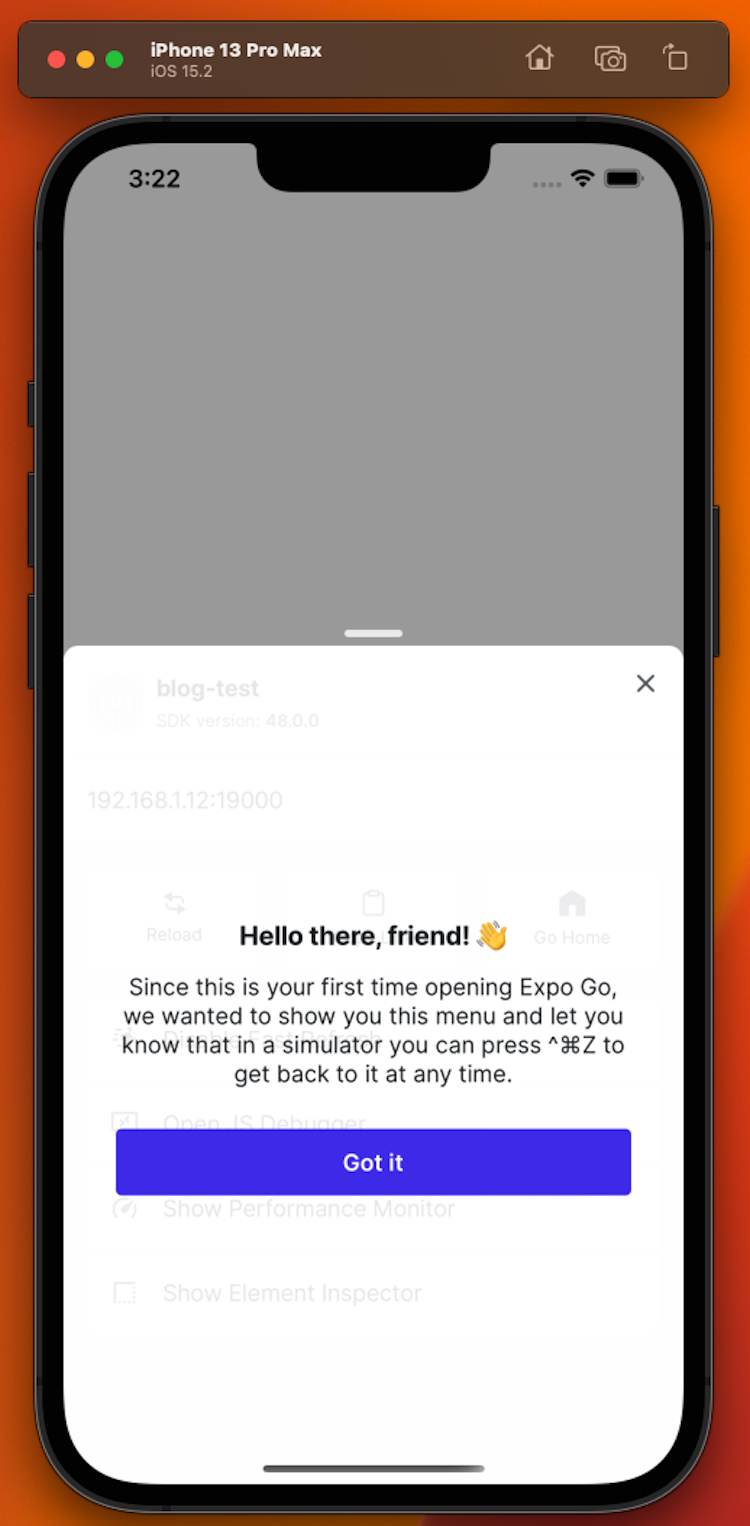
You can click “Got it” and then close out of the bottom sheet. You can explore more information on what all of this means if you would like. However, I’ll be moving forward with getting your environment set up.
React Native hot reloading
One of the great features of React Native is hot reloading. Let’s get a small taste before we get bogged down by package installation.
Open VSCode again and navigate to the App.js file. Change the text within the <Text> component to anything you want, and then save the file. Immediately you should see your emulator reload with the new content.
Pretty cool. Right?
With the initial project creation out of the way, we still need to resolve some lingering issues. We haven’t set up linting to help reduce bugs or typescript to strongly type our JavaScript or prettier to help with formatting consistency but don’t worry, we will explore that next, and it should be quick!
While we install these next packages, we can stop our server.
Click into the terminal and press:
`ctrl + c`
This will stop the server while we install the new packages. This isn’t completely necessary as we won't be making any native layer changes (these are changes to the underlying code that runs on the device “below” our javascript layer), but when the time comes, we will start the server backup and continue.
ESlint
To install all the necessary packages for linting run the following command:
`npx expo install eslint eslint-config-universe`
Notice our use of `npx expo install` and not `yarn` or `npm`. Expo has a wrapper around the package installer, which parses your install command and installs package versions that are compatible with your version of Expo. This ensures that if Expo relies on a specific version of your package, it is installed. If Expo has no reliance on the package you are installing, it will fall back to using your package installer directly.
Once the command completes, you should have all the necessary packages to set up linting.
ESLint configuration file
Our next step will be creating our ESLint configuration file.
At the root of your application, create a new file called `.eslintrc.cjs`
Inside this file, paste the following code:
module.exports = {

  extends: [

    'universe',

    'universe/native',

    'universe/web',

    'universe/shared/typescript-analysis',

  ],

  overrides: [

    {

      files: ['*.ts', '*.tsx', '*.d.ts'],

      parserOptions: {

        project: './tsconfig.json',

      },

    },

  ],

  plugins: ['react-hooks'],

  rules: {

    'import/order': 'off',

  },

  env: {

    node: true,

  },

};
→ If you’d like to read more about ESLint configuration files, you can do so here.
However, the goal of this article is not to bog you down with a ton of linting rules from the start. It’s to get your environment into a state to help promote learning.
All our configuration file is really doing is saying, “Use these predefined configurations.” At any time you feel comfortable, you can edit this configuration file and override any rules you feel necessary. However, these are a very good starting point for your development.
→ You can read more about Expo Universe here.
We are almost there! Because Expo-Universe relies on Prettier, we need to go ahead and install it. Don’t worry. We will return to this once we get ESLint and Typescript setup, but for now, just run the following command to install Prettier.
`npx expo install prettier`
Once that is complete, we can move forward.
Let’s add the following “script” to your package.json. This will allow us to run ESLint over our code base and see if there are any warnings.
`"test:eslint": "echo \"\\033[33mRunning eslint check\" && eslint ."`
Your entire package.json should now look something like the following
{

  "name": "blog-test",

  "version": "1.0.0",

  "main": "node_modules/expo/AppEntry.js",

  "scripts": {

    "start": "expo start",

    "android": "expo start --android",

    "ios": "expo start --ios",

    "web": "expo start --web",

    "test:eslint": "echo \"\\033[33mRunning eslint check\" &&  eslint ."

  },

  "dependencies": {

    "eslint": "^8.39.0",

    "eslint-config-universe": "^11.2.0",

    "expo": "~48.0.15",

    "expo-status-bar": "~1.4.4",

    "prettier": "^2.8.8",

    "react": "18.2.0",

    "react-native": "0.71.7"

  },

  "devDependencies": {

    "@babel/core": "^7.20.0"

  },

  "private": true

}
Be careful with copy-paste. Some dependency versions may have changed. Just take a look at the newly added “test:eslint” script. This is a new “script” we have added to allow us to test our codebase against our ESLint (and by proxy Prettier) configurations.
Let’s run the command now.
In your terminal run:
`yarn test:eslint`
You should be greeted with a few warnings.
You should see something similar to the one below

Notice we don’t have any ESlint errors. The only complaint is from Prettier.
It wants us to modify some code to match its ruleset. Specifically, here, it wants us to replace the double quotes with single quotes! We can ignore these. For now, we are more concerned with demonstrating an ESLint warning.
Navigate to your `App.js` file and add the following to the `App` component:
import { StatusBar } from "expo-status-bar";

import { StyleSheet, Text, View } from "react-native";


export default function App() {

  const variable = "variable";


  return (

    <View style={styles.container}>

      <Text>My Name is Trent, and I just created my first expo app!</Text>

      <StatusBar style="auto" />

    </View>

  );

}


const styles = StyleSheet.create({

  container: {

    flex: 1,

    backgroundColor: "#fff",

    alignItems: "center",

    justifyContent: "center",

  },

});
Run the test command again and you should be greeted with a new warning.

This is great!
Linting is letting us know of a potential issue with our code:
An unused variable
This may seem innocuous. However, linting is very powerful and can also sniff out other potential problems with your code.
Now that we have it set up you can be sure that linting will identify potentially problematic code in your application. This is helpful when learning as ESLint will give you clear messages regarding why your code may be wrong. In the warning above, you can see the `no-unused-vars` rule being identified, along with a warning.
This allows you to research the rule, understand why it’s a problem, and seek an appropriate solution. Without ESLint, however, it’s possible not to notice the issue at all.
Typescript
Typescript should be more straightforward. Since we already have ESLint setup, adding Typescript should be quite simple.
Let’s start by running the following command:
`npx expo install @types/react typescript`
This will install typescript and the necessary type definitions for our code so that typescript can “strongly” type our code. These are the supplied type definitions from react (most packages supply them) that are necessary for typescript to understand the types that react and react-native have defined.
Once we have typescript installed, much like ESLint, we must set up a configuration file. This will tell Typescript how to process our code and when to provide warnings & errors.
Don’t worry Expo will supply the base configuration. When you’re feeling up to it, you can modify it to your preference.
Navigate to the root of your application and create a new file named `tsconfig.json`
Inside that file, paste the following configuration:
{

  "extends": "expo/tsconfig.base",

  "compilerOptions": {

    "strict": true,

    },

    "jsx": "react-jsx"

}
Again similar to ESLint, we have leveraged expos default configuration to create our own. We are welcome to modify it. However, Expo has already worked on creating a solid configuration, so leaning on them makes our lives easier.
→ Read more about Typescript config files here.
Once that is complete, we will add another `package.json` script
`"test:tsc": "echo \"\\033[33mRunning typescript check\" && tsc"`
Your new `package.json` should match the following:
{

  "name": "blog-test",

  "version": "1.0.0",

  "main": "node_modules/expo/AppEntry.js",

  "scripts": {

    "start": "expo start",

    "android": "expo start --android",

    "ios": "expo start --ios",

    "web": "expo start --web",

    "test:eslint": "echo \"\\033[33mRunning eslint check\" &&  eslint .",

    "test:tsc": "echo \"\\033[33mRunning typescript check\" && tsc"

  },

  "dependencies": {

    "@types/react": "~18.0.27",

    "eslint": "^8.39.0",

    "eslint-config-universe": "^11.2.0",

    "expo": "~48.0.15",

    "expo-status-bar": "~1.4.4",

    "prettier": "^2.8.8",

    "react": "18.2.0",

    "react-native": "0.71.7",

    "typescript": "^4.9.4"

  },

  "devDependencies": {

    "@babel/core": "^7.20.0"

  },

  "private": true

}
Running a Typescript test
Let’s try running a test to see if our code passes the Typescript test. In your terminal, run the following command:
`yarn test:tsc`
You should receive the following output:

Yay! Our code has no typescript errors!
But wait, we don’t actually have any typescript files yet.
Right now, our only file is our `App.js` file. Typescript doesn’t look for this file because it doesn’t have the correct extension. Typescript doesn’t know that we want this to be a Typescript-compliant file.
Let’s rename this to `App.tsx` for now. Once you have done that, re-run your test.
You should receive the same output, but Typescript reviewed your file this time and found no issues! Let's try forcing one.
Let’s navigate back to `App.tsx` where we originally declared the `variable` variable.
Let's replace that with the following Typescript:
const variable: number = "variable";As you may have already noticed, we are assigning a string to a variable that we declared as a number. That’s no good!
If we re-run our test, Typescript should pick up this error and display it, allowing you to fix it.
Try running the `test:tsc` command now.
You should be greeted with the following error:
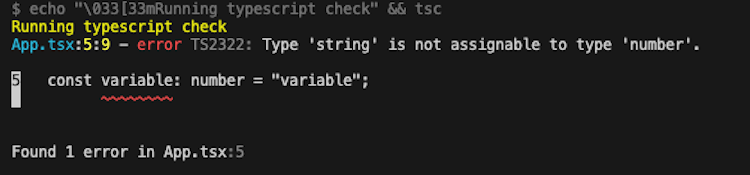
Let’s update the type definition for the variable to a “string”
const variable: string = "variable";Re-running the test command, we should no longer receive the error “Type ‘string’ is not assignable to type ‘number’” because we are correctly assigning the variable a type and setting that variable to the correct type, great work!
Prettier
In the previous ESLint section, we installed prettier because it depended on Expo Universe. We will utilize that package here.
Learn more about Prettier configuration here.
As with ESLint and Typescript, prettier has its own configuration file.
Navigate to the root of your application and create the following file named `.prettierrc.json`.
Inside the file, paste the following configuration:
{

  "arrowParens": "avoid",

  "bracketSpacing": true,

  "bracketSameLine": true,

  "printWidth": 80,

  "semi": true,

  "singleQuote": true,

  "tabWidth": 2,

  "trailingComma": "all",

  "useTabs": false

}
This configuration ensures that prettier formats our document accordingly. If you want a specific configuration, feel free to update this anytime. However, this setup leads to very readable code. That’s it for prettier. Pretty easy!
VSCode
During this section, we will install some packages for Visual Studio Code and edit our workspace settings to allow us to work more fluidly. There is no need to run all of the testing commands manually. We should be able to work on our application and let the tools do their job as we develop.
This will include automatically running prettier on save, displaying ESLint and Typescript errors inline, and automatically formatting some linting issues away (such as unused imports!).
With VSCode open, navigate to the extensions panel.
Search for the following extensions, and install them:
ESLint
Prettier

Once you have them installed, we will modify your workspace settings.
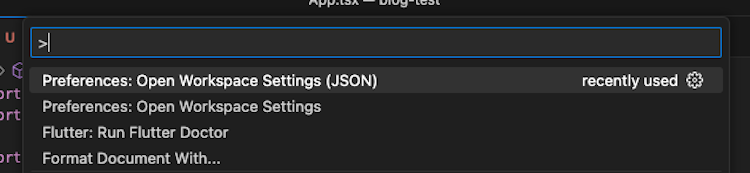
Let’s start by pressing: `ctrl + shift + p`
when prompted to select “Open Workspace Settings (JSON)”
Since this is a fresh application, this settings file should be empty. Let’s change that.
Paste the following JSON configuration into your settings.
It’s important that you do this in “workspace settings” because when committed to a repository, it allows anyone who works on this application to do so with the same configuration and setup as you have, eliminating the need to discuss formatting rules, etc…
{

  "editor.codeActionsOnSave": {

    "source.organizeImports": true,

    "source.fixAll.eslint": true

  },

  "editor.defaultFormatter": "esbenp.prettier-vscode",

  "editor.formatOnSave": true

}
The above configuration is quite simple. We set up a few rules to follow when a developer saves a document. The neat thing is that these rules will follow the configuration guidelines we setup and will run them appropriately.
The above configurations tell ESLint to automatically organize our imports and fix any linting errors if possible. It also tells Prettier to format our document automatically. As we create/modify/save new documents, they are automatically formatted correctly when saved.
One final step before we are done, the automatic linting and code formatting are great, however, it does rely on having ESLint and Prettier VSCode extensions installed.
While we can’t force a developer to install these, with VSCode “recommended extensions” we can heavily suggest them.
Open up the `Workspace Recommendations` run the following command:
`ctlr + shift+ p` and type: `Configure Recom`
It should be the first option on the list.

Paste the following configuration into the file:
{

  "recommendations": [

    "dbaeumer.vscode-eslint",

    "esbenp.prettier-vscode",

  ]

}
When a new developer opens your application in VSCode, they will be greeted with a message to install the recommended extensions, allowing them to take advantage of the automated linting and formatting! Since we did install new extensions, it’s a good idea to restart VSCode to ensure everything is running properly!
One final test
With all of that complete, we have one final test to ensure everything works correctly.
Navigate to our `App.tsx` file and paste the following code:
import { StatusBar } from "expo-status-bar";

import { StyleSheet, Text, View } from "react-native";

import { Image } from "react-native";


export default function App() {

  const variable: number = "variable";


  return (

    <View style={styles.container}>

      <Text>My Name is Trent, and I just created my first expo app!</Text>

      <StatusBar style="auto" />

    </View>

  );

}


const styles =         StyleSheet.create({

        container: {

    flex: 1,

         backgroundColor: "#fff",

    alignItems: "center",

             justifyContent: "center",

  },

});
The above is a good example of what a typical file could look like when developing a new React-Native project. We have different spacing across the file, unused `Image` import, an unused variable, etc.
Lots of cleanup to be done here.
However, that is short work with our new setup!
After pasting, you should immediately be greeted with warnings/errors/etc. Telling you how bad our code is. However, with one quick save, everything is resolved. The unused imports should be removed, and the document formatting should automatically be altered to match our config!
import { StatusBar } from "expo-status-bar";

import { StyleSheet, Text, View } from "react-native";


export default function App() {

  const variable: number = "variable";


  return (

    <View style={styles.container}>

      <Text>My Name is Trent, and I just created my first expo app!</Text>

      <StatusBar style="auto" />

    </View>

  );

}


const styles = StyleSheet.create({

  container: {

    flex: 1,

    backgroundColor: "#fff",

    alignItems: "center",

    justifyContent: "center",

  },

});
Note
The unused variable is there and it displays a warning. This is intended. You should still receive a visual warning; running your tests from `package.json` should still output a warning. ESlint didn’t modify your code and remove it. As a developer, you can either remove the unused variable, or it may be a key warning indicating the variable should have been used and wasn’t!
You did it!
Phew, the setup is complete!
ESLint, Typescript, and Prettier are essential tools for any React Native application, and I never start a project without them.
Now that you have completed this setup, you also have the tools to help you grow and learn as a React-Native developer without wasting countless hours tracking down bugs that these tools could easily catch.
Feel free to experiment with the configuration files, find a setup that works well for you, and stick with it! This setup isn’t meant to change the way you work with React Native completely, but it should give you a strong foundation for creating a consistent and bug-free application.