Rebasing branches with git is a process that all developers work through. It can be challenging at times to get all your commits exactly where you're hoping that they will end up. While git isn't perfect, git rebase --onto can help tame your branches when you have to work with non standard rebasing. git rebase --onto let's us be a little more choosy about where and which commits we want to more easily handle complicated rebases.
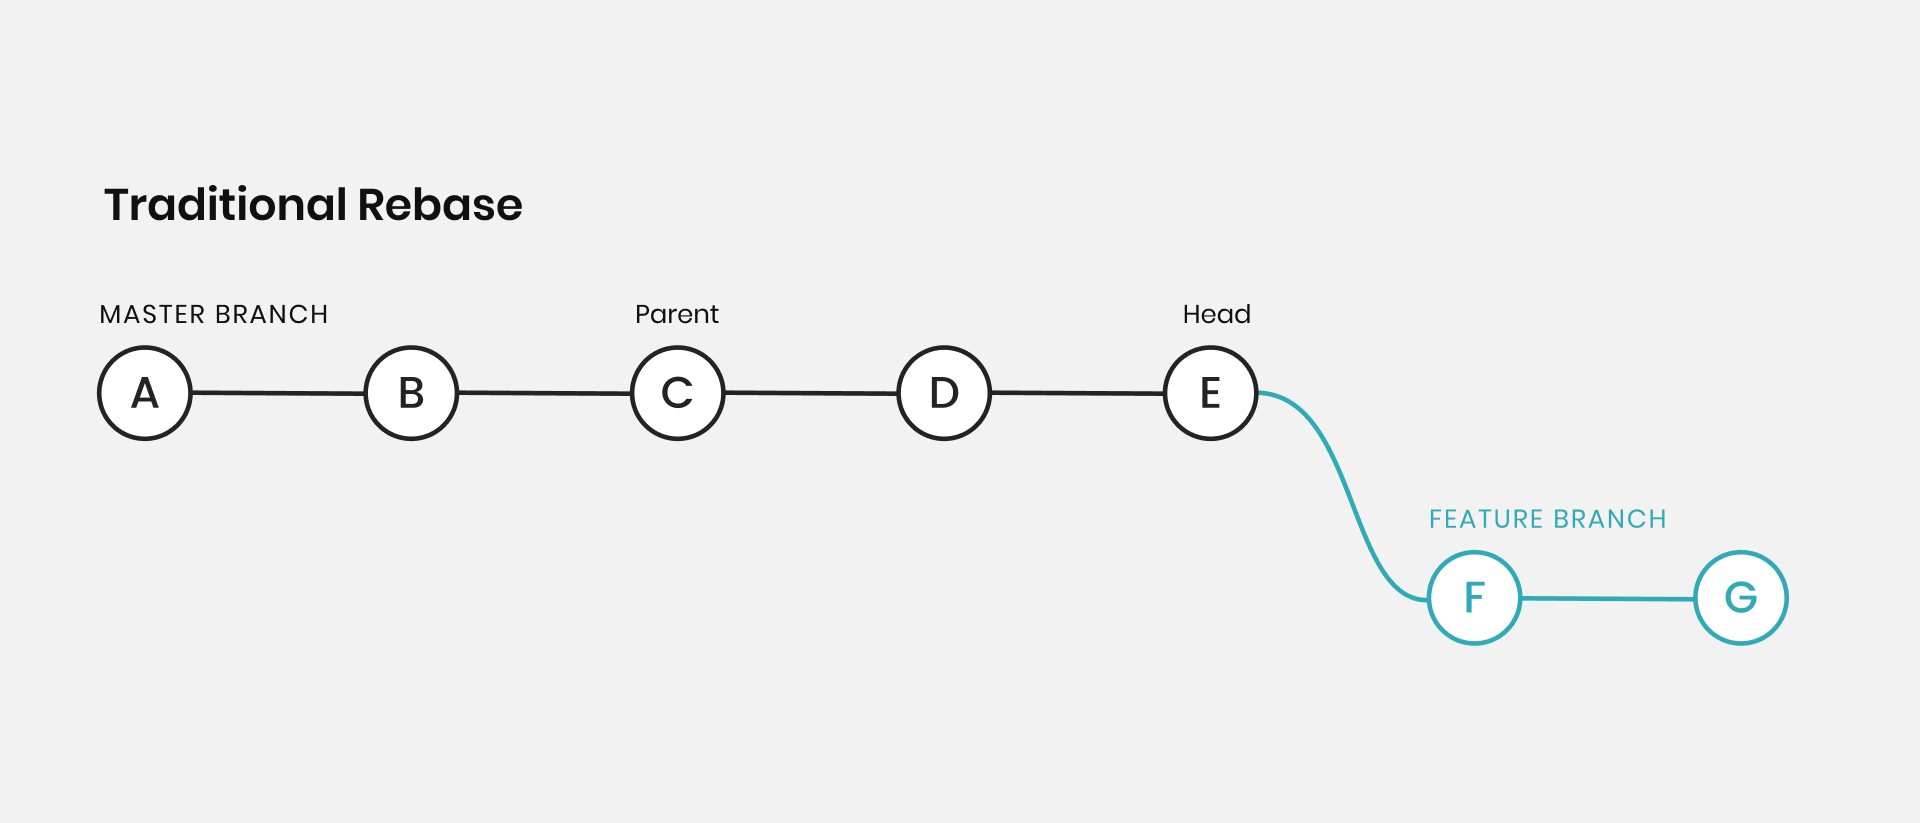
How a traditional rebase works
Traditional rebases (those without the --onto flag) are pretty easy to understand. Commits get applied to the head of the branch you originally created your working brach off of this works for the majority of cases but sometimes the head of your base branch is faulty, or your doing some testing and want to move your feature branch one commit at a time.
Most of the following examples are pretty contrived, but I think `git rebase --onto` is applicable to a number of situations. Testing large feature branches, or moving a feature branch from one base to another base. Reasons to use `git rebase --onto` include fixing mistakes, or moving a feature off of a feature branch and onto a base branch of some kind. `git rebase --onto` can be your friend when you need a scalpel for your `git rebase`.
To easily reproduce a bunch of commits in a repo and make it easy to work with, here is a quick bash script that will generate a ruby file and commit a bunch of times to make our "git world" more consistent.
#!/bin/bash

function create_basic_git_repo()
{
echo 'git rebase is great'
mkdir gitexample
cd gitexample
git init
mkdir lib
touch lib/my_thing.rb
echo "class MyThing; def my_method; 1 + 1 == 2; end; end" | tee lib/my_thing.rb
git add lib/my_thing.rb
git commit -m 'Commit 1'
echo "class MyThing; def my_method; 1 + 2 == 3; end; end" | tee lib/my_thing.rb
git add lib/my_thing.rb
git commit -m 'Commit 2'
echo "class MyThing; def my_method; 1 + 3 == 4; end; end" | tee lib/my_thing.rb
git add lib/my_thing.rb
git commit -m 'Commit 3'
git checkout -B My_Feature_Branch
echo "class MyThing; def my_method; 1 + 4 == 5; end; end" | tee lib/my_thing.rb
git add lib/my_thing.rb
git commit -m 'My Feature Commit 1'
echo "class MyThing; def my_method; 1 + 5 == 6; end; end" | tee lib/my_thing.rb
git add lib/my_thing.rb
git commit -m 'My Feature Commit 2'
git checkout master
echo "class MyThing; def my_method; 1 + 6 == 7; end; end" | tee lib/my_thing.rb
git add lib/my_thing.rb
git commit -m 'Commit 4'
echo "class MyThing; def my_method; 1 + 7 == 8; end; end" | tee lib/my_thing.rb
git add lib/my_thing.rb
git commit -m 'Commit 5'
}

create_basic_git_repo
In this repo you should see a `lib` directory as well as a file called `my_thing.rb` with some commits on. 5 commits on the `master` branch and 2 commits on a feature branch that are based off of the third commit of the `master` branch. The SHA's between your repo and my repo will be different, but at least the commit messages will be the same to easily follow what we are doing below.
Object Identifiers
As a quick aside, let's talk about object identifiers in git for a second.
An object identifier usually identifies a commit, we often call them SHA's but we can also be talking about a branch. When we refer to set a of work by the branch name we are just talking about the collection of commits that make up and we reference the head of that collection of commits by the name of the branch.
Any object identifier is a valid argument with a rebase. We can rebase on a branch name, a SHA, a tag, as long as it identifies a commit, it is a valid argument to rebase.
Git rebase —onto
There are two versions of git rebase --onto , the binary and ternary functions. Also written as git rebase --onto/2 and git rebase --onto/3.
Git rebase —onto/2
The two argument version of git rebase onto is used to move a set of commits from one one object identifier to any arbitrary object identifier.
In words I want to move my set of commits from one commit to any other arbitrary commit.
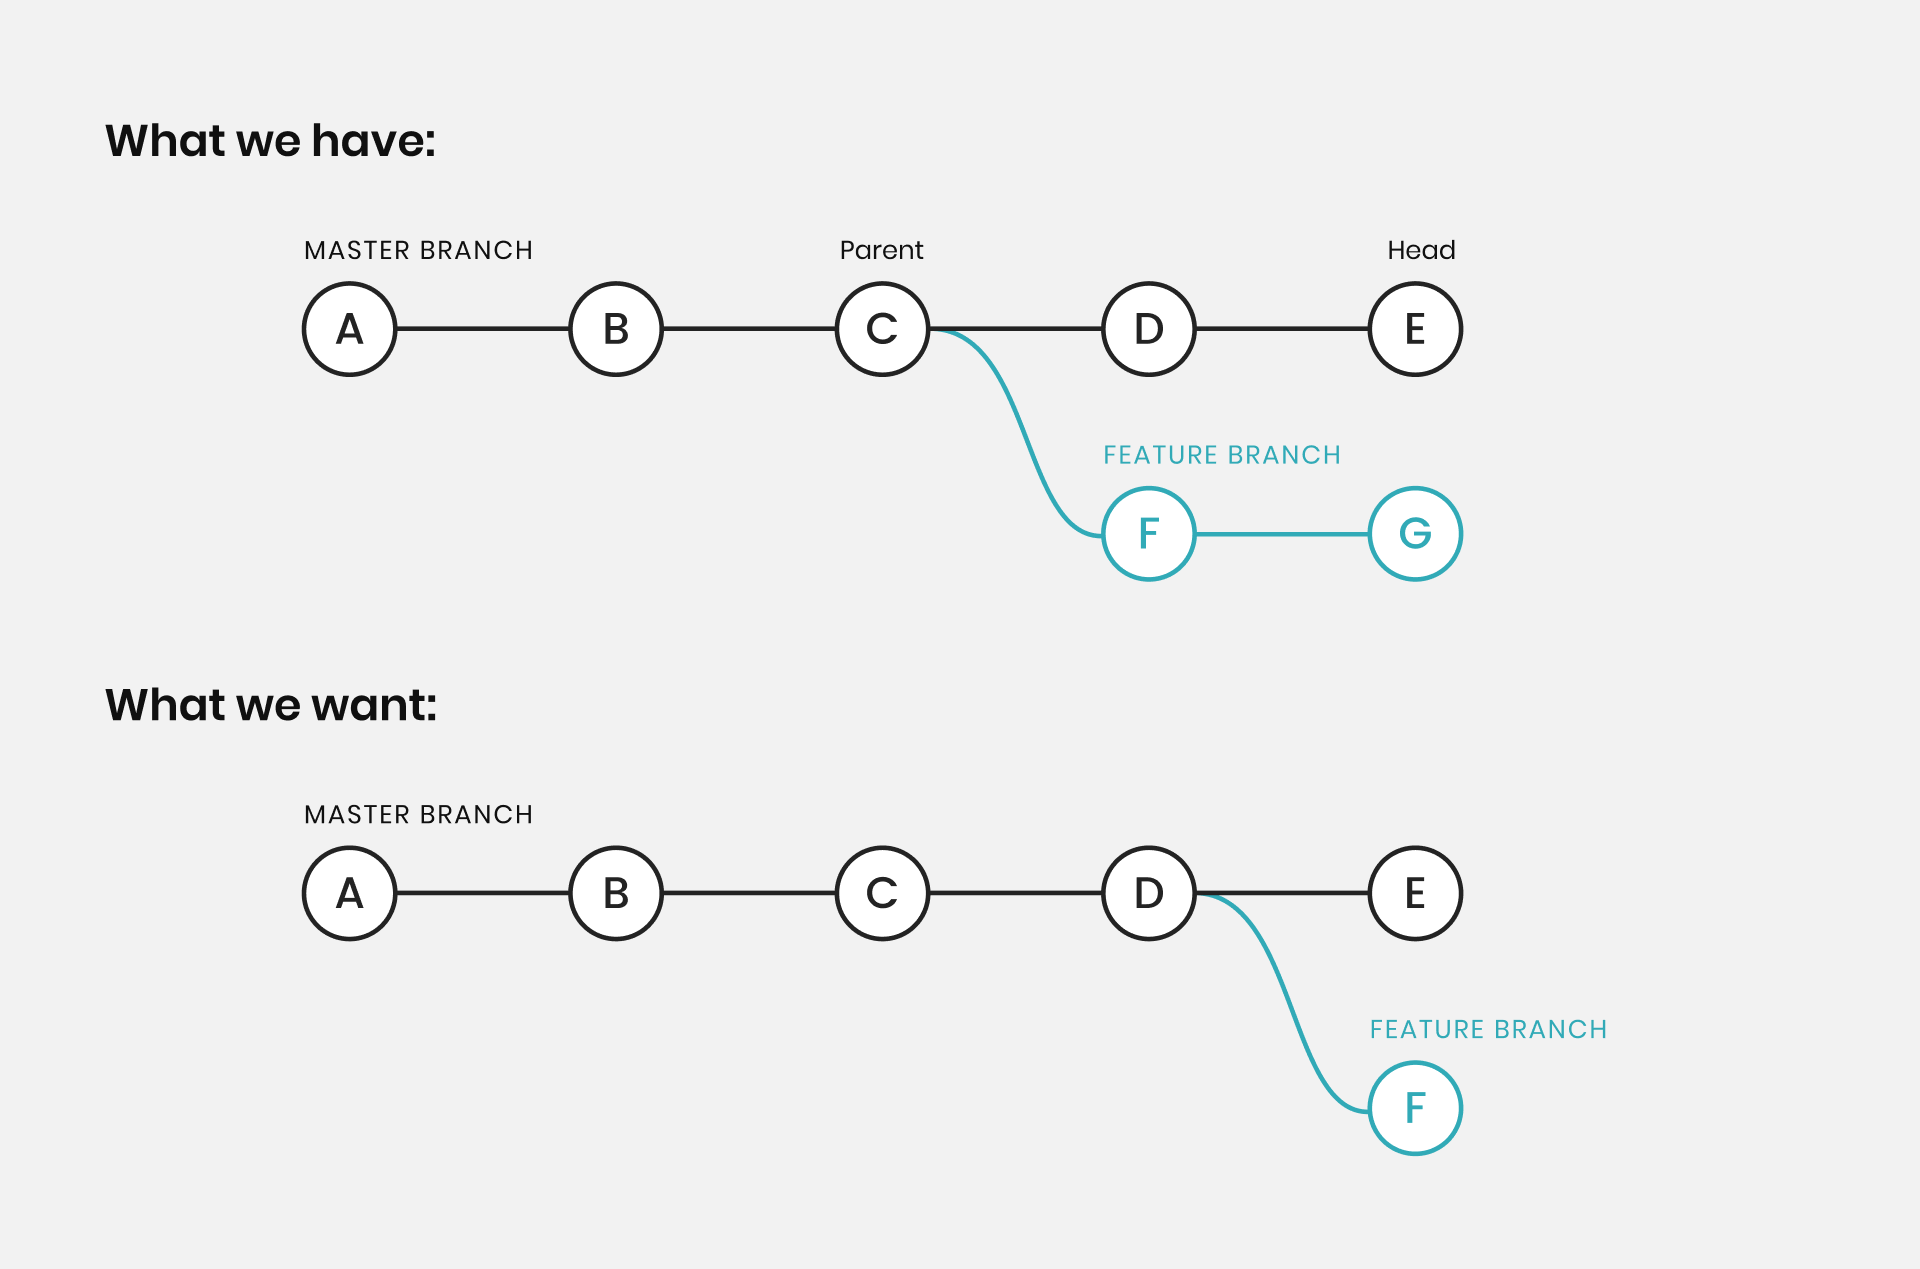
For the most part, this is helpful if you don't want to move your commits to the top of a branch or for some reason you can't have your feature branch at the top of `master` . But it can also be useful if you have a release branch and need to maintain your work across multiple branches.
I like to think about `git rebase --onto/2` git rebase "where I want to go" from "where I was", with "where I want to go" being the object identifier of the place you want all your commits to go to and "where I was" to be the object identifier of where your branch is currently sitting off at.
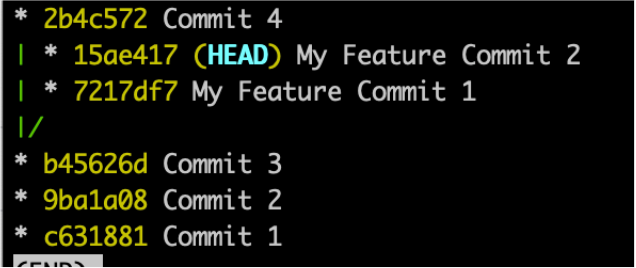
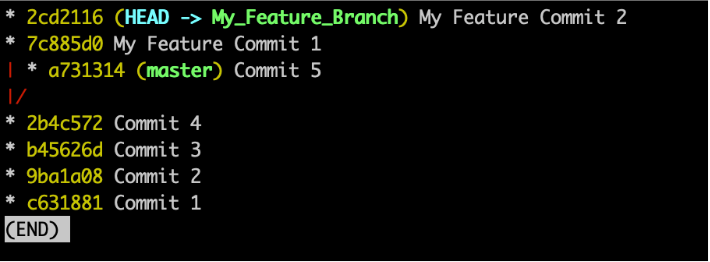
For example in this case I did `git rebase --onto 2b4c572 b45626d`
I want my work to be on top of commit 4 with SHA `2b4c572` and it's currently on commit 3 with SHA `b45626d`. Not too bad or crazy complicated. For these cases I took the changes from `My Feature Commit 1` and `My Feature Commit 2` to make sure the commits applied to see the example.
Git rebase --onto/3
The three argument version of git rebase --onto is a little more powerful, but not as useful always. I tend to only use it when I have really messed something up or have a pretty nifty reason to use it. In fact, I am not certain I have ever used it to do something entirely *useful* in git repository. Either way, it could be useful at some point.
For this one, we want to move my set of commits from one object identifier to another object identifier, but I want to only select a certain amount of commits from my branch.
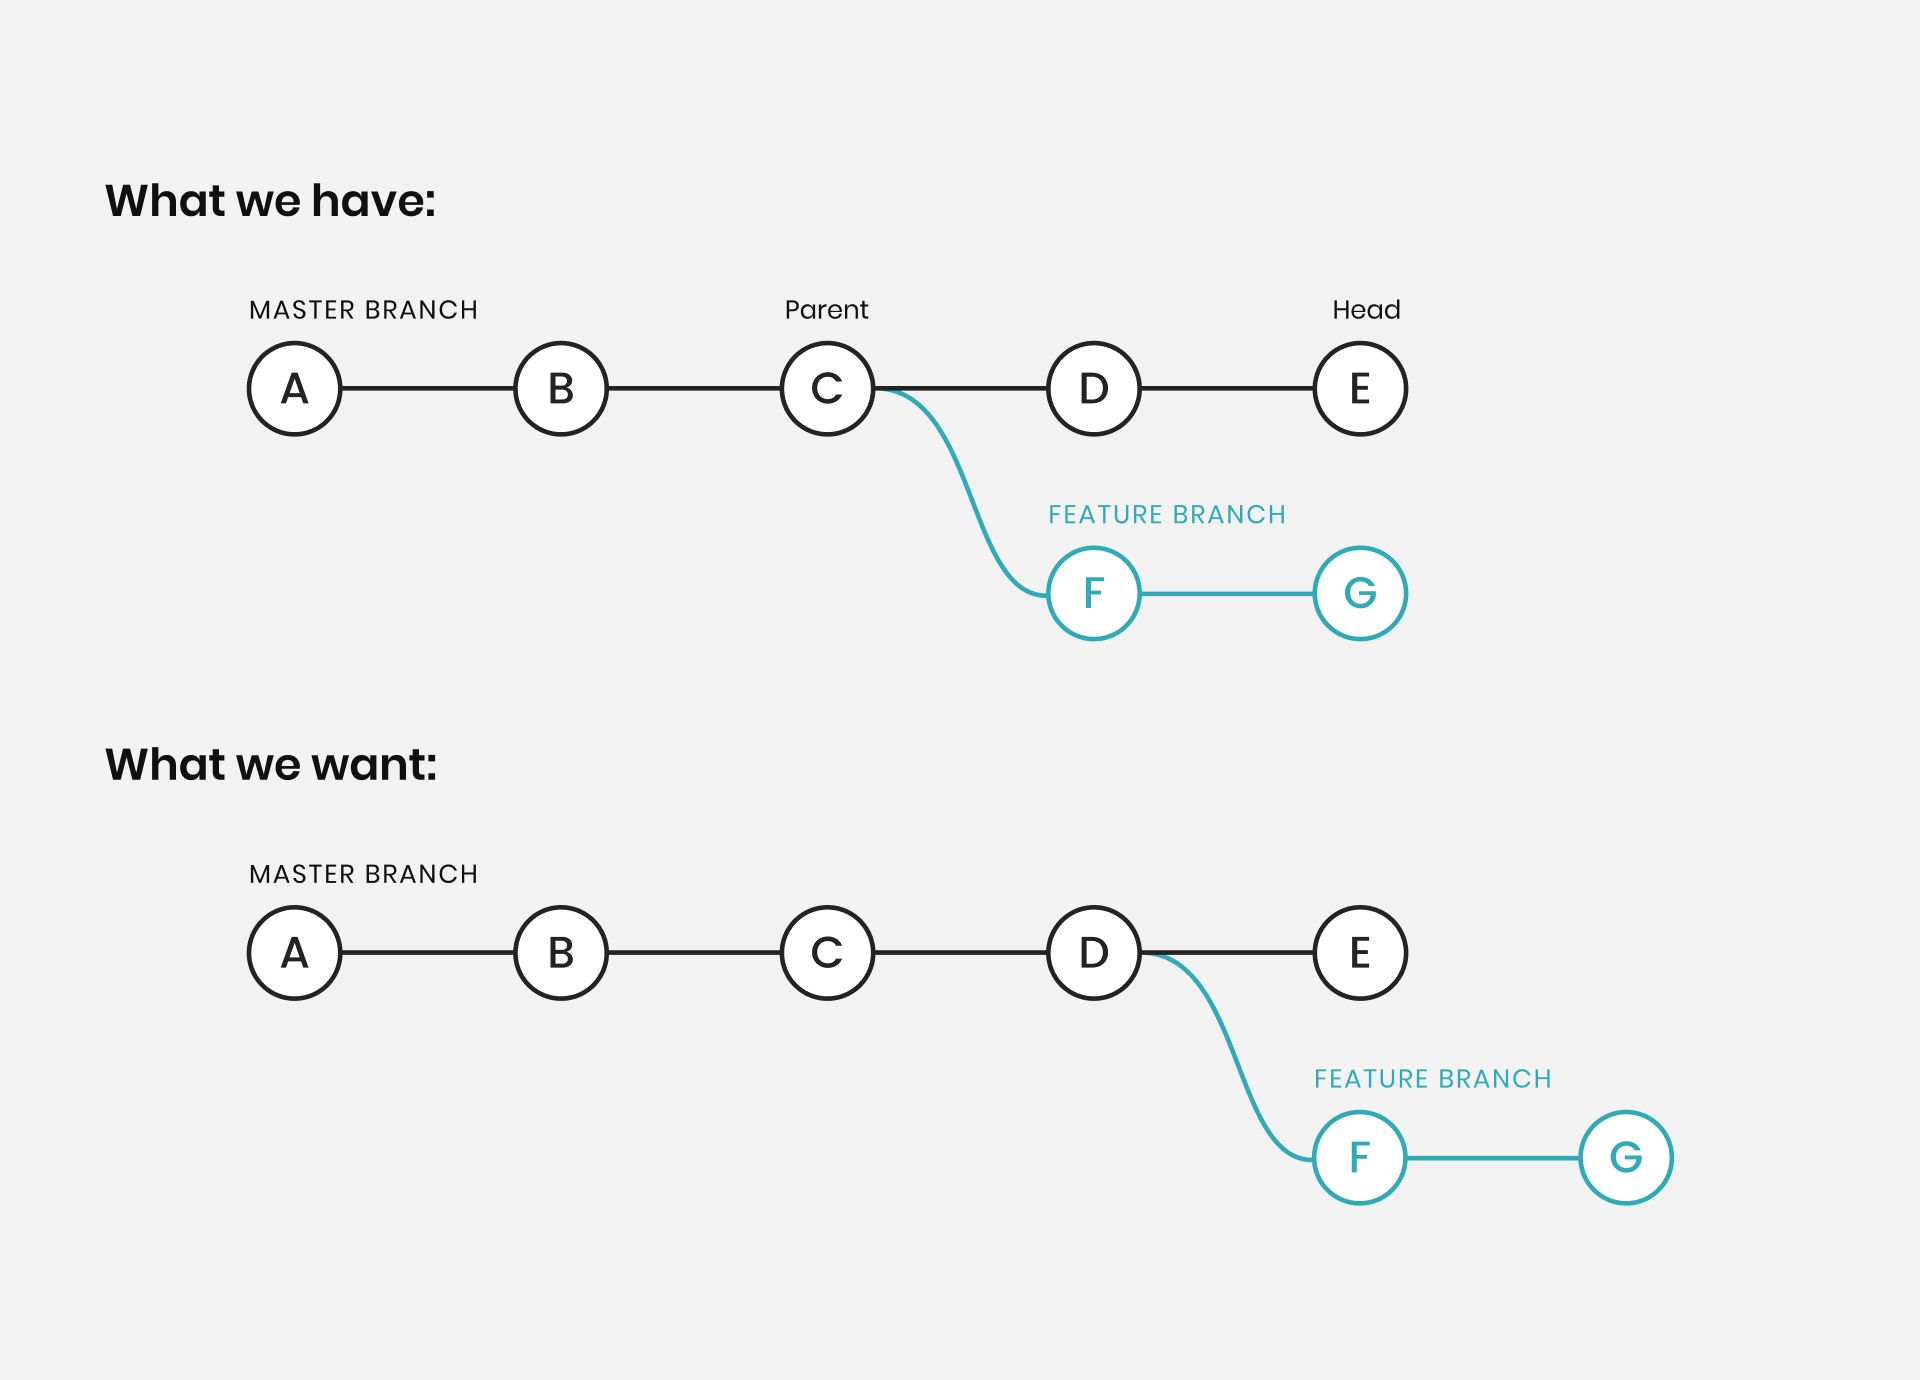
Note that we masterfully and easily cut out commit G from our feature branch. This makes it pretty easy to do this.
We want to `git rebase --onto "where I want to go" from "where we were" up to "my chosen commit"`
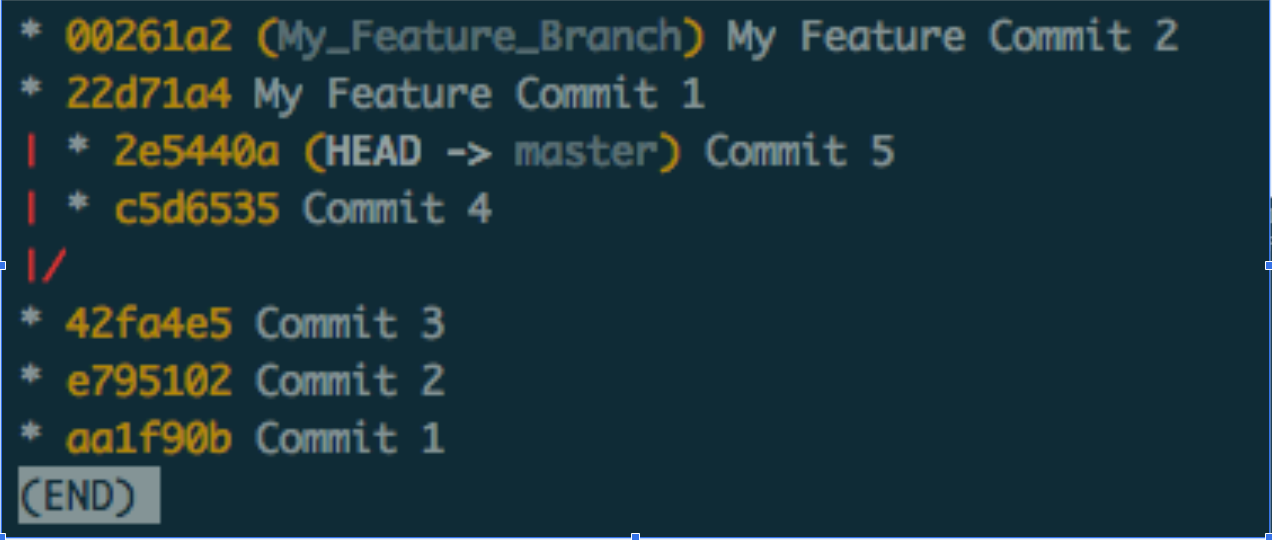
For example here we could do `git rebase --onto c5d6535 42fa4e5 22d71a4`
We are at commit 42fa4e5 and we want just commit 22d71a4 on top of commit c5d6536.
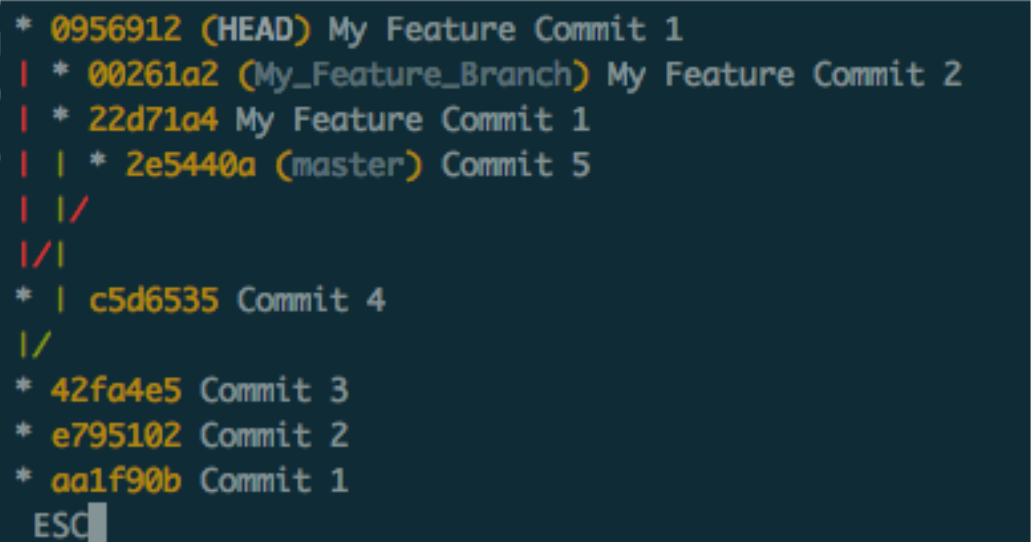
One thing to note is that `git rebase --onto/3` leaves `HEAD` in a detached state and to save this state, you need to name the branch something.
All of these examples were generated using a quick bash script that generates the same commits each time. Though the commit SHA's (object identifiers) will be different (thanks Git!).
Feel free to check out the bash script and play around with `git commit rebase --onto` it can take some getting used to but its a powerful tool that has really helped me minimize some `git` pain in the past.